That being said, this class is constantly something I like to call a WiP (Work-in-progress). The idea is that it's a course that does some light research/investigation of the different major periods of art history but it's something that allows for a lot more than just looking at and memorizing slides. It's a course that is project-based (usually about 8-10 projects total) and is crammed into just one semester. I will introduce a period of art history with a powerpoint show to highlight some of the interesting and important items/features of specific periods of history, we will do some light discussion, and the next day we will come in to class and start right away on a project that is inspired and informed by the current period of art history we are examining. The projects are mostly mixed media in nature but I always try to design/implement project ideas that will come as close to the real thing - visually at least as I can. It's one of the three foundational courses offered in the visual arts catalog and it's fast becoming one that baits kids who are only interested in getting their fine arts credit and leaving to actually enroll in more art courses and stick around in the visual arts world just a little while longer.
Our first project was for Black History month (I will be posting these pictures later this week if I can find the time) but this is our second project which kicks off art history as a whole. Last year we imitated cave art pieces on paper but this year? We actually fabricated pieces that looked like cave walls...
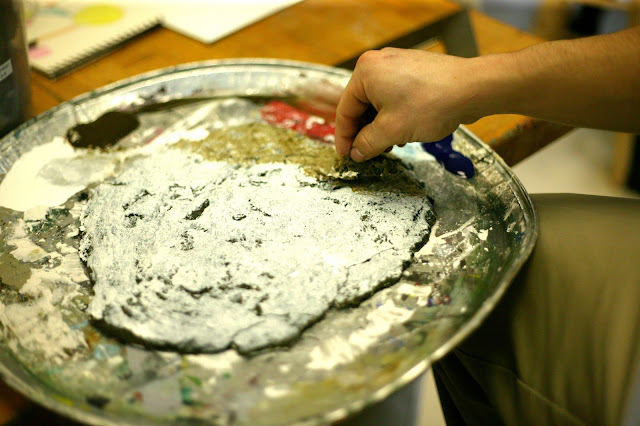
Last year when I did this period, I got some cave art kits from Nasco that were reasonably priced but overall left a lot to be desired for. (The kits are better suited for younger kids or people who have a lot less time in the classroom than I do.) I don't have pictures of what we did but they were underwhelming in that they looked like cave art but they were only on flimsy paper that could easily be torn and/or be forgotten. Since I did them I become determined to figure out how we could imitate cave art more closely. This past summer I hit the jackpot when I worked as the arts and crafts director for the school's sumer program and I made dinosaur fossils with the little kids. The idea of how to actually fabricate a faux cave wall came to me almost completely on accident when I was in the midst of testing out the plaster of paris and discovered that if you mix it and time it just right to when it starts to get thick, you can pour it out quickly and sculpt it to imitate a rock wall like this...
 |
| This is a "cave wall" portion" that was poured and is now being painted/texturized with sponges and layers of earth-toned paints to achieve the look of real rock. |
Things I would suggest if you try this...
- Get the Cave Art Kits I mentioned above if only to have the sponges to use of the simple shapes to lay down the shapes. This might seem a little like cheating but the sponges are useful for both creating a more authentic rock surface AND laying down some of the cleaner edged cave art shapes that cave art is so known for.
- Use Silicon bowls or large mixing bowls that have some give/flex when you mix the plaster because when it sets? You just need to flex the bowl a little and then pop the dried plaster out of the bowl and throw it away. You can use regular rubber spatulas to mix, pour, and texturize the plaster once it's poured.
- MONITOR THE STUDENTS VERY CLOSELY. You can tell them a million and one times that the plaster casting process is very easy to mess up but it's hard to really understand how easy it is to mess up until after it starts to harden a little and then all of a sudden it's all a solid chunk of rock stuck to the bottom of the bowl.
- Once the plaster is poured, let it set for a good 10 minutes longer than when you think it's OK. Even though it appears hard, it's usually still a little soft and when you try and lift it off of it's poured surface, it usually breaks and is crumbly.
- For even more realistic cave walls: CAREFULLY break the large chunks of cave into smaller pieces, paint them and wait for them to dry, and then glue them back together to make it look like the wall is actually cracked/breaking apart. And if the wall you poured accidentally cracks? Well, you can do the same thing and it's not loss, harm, or foul.


No comments:
Post a Comment